How Long does Home Composting take? What Methods are Available to Start Now?
Purchasing items through the links provided in my blog is a way to help me earn a small commission at no extra cost to you. Thanks for your interest and support!
What is Composting?
Composting is the decomposition of organic matter into a nutrient-rich soil amendment to help improve plant growth. There are many methods to composting! Some on a larger scale, but some average family-size friendly. Depending on the method you decide to use plus certain environmental factors, your compost can be ready anytime between 24 hours to over a year. Sounds like a huge range of time to wait, right? Let’s evaluate some methods to composting at home!
Outdoor Composting Methods
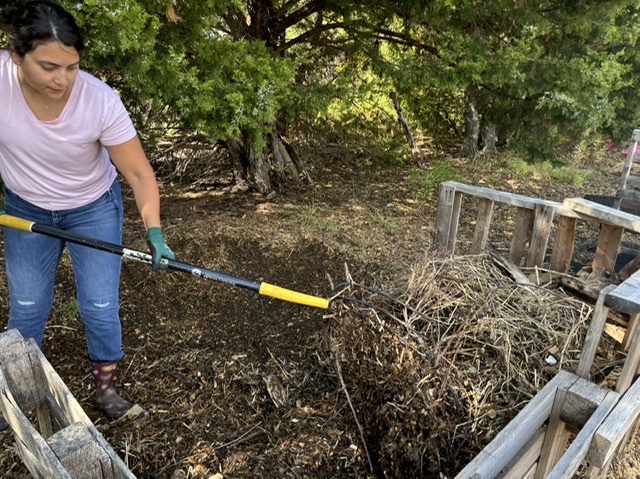
Aerobic Composting Pile
- Compost Time: 1 month depending on your ambition to turn the pile
- Maintenance Rating: 4/5 Stars
- Materials Needed: DIY Pallet/Compost Bin, Pitchfork/Shovel, Compost Thermometer Probe (Optional)
Aerobic means to be active or alive with oxygen. Hot composting requires frequent turning of the contents in your compost pile to allow oxygen to keep all living organisms alive and active. As you turn the pile, the temperature rises which is a good sign that the organisms in your compost are active and breaking down the contents. Best temperatures can range between 90 to 140 degrees Fahrenheit (about 30-60 degrees Celsius). With a balanced ratio of greens to browns and a little bit of muscle from your part, this method is relatively quick, taking only a couple of weeks to finish.
Things To Consider
This method is quick but best used when you have a lot of material to decompose at once. It requires some muscle and a pitchfork or a shovel to turn the pile when the temperature thermometer reads above 140 degrees Fahrenheit ( 60 degrees Celsius). You wouldn’t want the life within your compost to become inactive or die off!
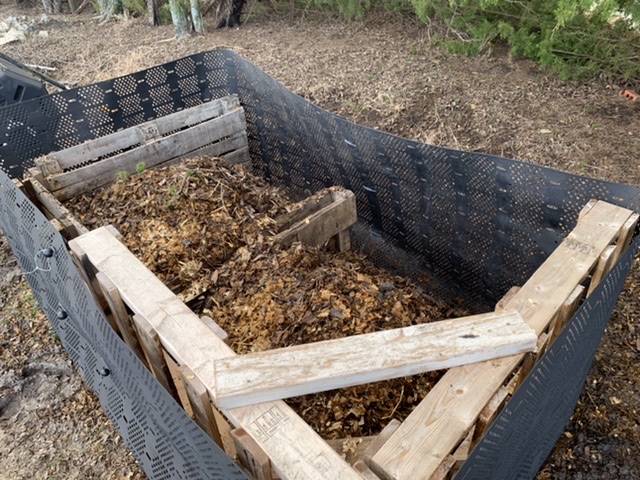
Cold Composting
- Compost Time: Over an Year
- Maintenance Rating: 1/5 Stars
- Materials Needed: DIY Pallet/Compost Bin
Cold composting is the lazy method to composting. You pretty much just layer your compost as it becomes available in a compost bin or pile. Eventually, nature will take over and everything will turn into compost!
Things to Consider
It will require a lot more time to get the end results. Over a year of waiting for sure. As a recommendation, since this composting method does not involve turning the contents, make sure you always have a nearby bin readily available with carbon rich browns. Every time you add kitchen scraps, you should layer a bit of browns so that you avoid attracting annoying flies, gnats, or other wild animals.
If you don’t have an extra pallet bin for your browns then you can always purchase an expandable compost bin. These bins are usually economical, lightweight and easy to assemble. They can be flimsy if you don’t have it at least half way full but they are large enough to neatly store all your fall leaves in one spot.
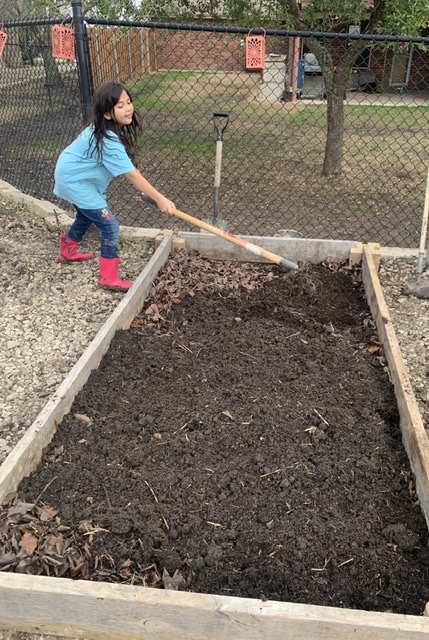
Direct In Ground Composting
- Compost Time: Over a Year
- Maintenance Rating: 1/5 Stars
- Materials Needed: Small Tool For Digging
Digging a trench or a hole and burying your food scraps is by far the oldest method used to feed nutrients back into the soil. There is not much to this method except to dig, bury, and water. This method takes a longer time to decompose but little effort on your part. The most effort you have to put in is actually digging the trench.
Things To Consider
Trenches take up space in your raised beds. It does not have to be large but all in all, if you have a small garden and are trying to use every space the best you can, then trenches and holes for direct composting will take away square footage from your planting layout.
If you bury anything that could be a tasty treat for outdoor animals in your area, they can make a mess of your garden. Hungry animals will destroy your crops, in turn, destroy your future harvest, and back track the time and effort you spent in the garden. Of course, this may not be your case if you don’t have many roaming animals around, or have a way of protecting your crops from these garden thiefs.
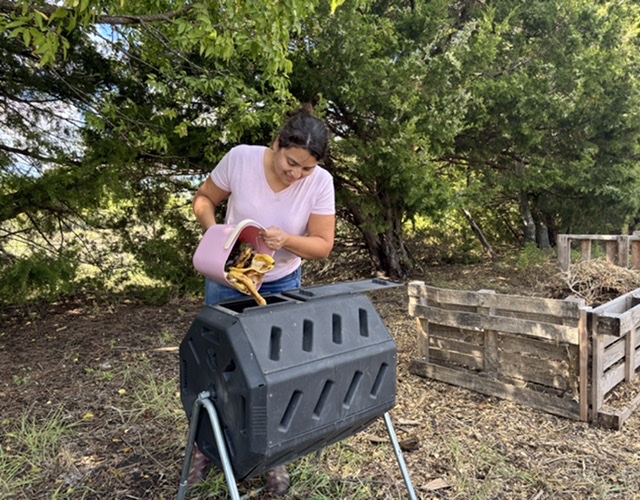
Compost Tumbler
- Compost Time: 4-8 weeks depending on how often you keep adding new kitchen scraps
- Maintenance Rating: 1/5 Stars
- Materials Needed: Compost Tumbler
As a newcomer to composting, I started years ago by purchasing a compost tumbler for my backyard. These tumblers are designed with air holes to help air circulate, and doors to keep rodents out. Some models have a stand and handles to aid with rotating but others are designed to roll around the ground.
It’s by far the easiest method to begin with and takes less space around your yard or patio. Because some compost tumblers are suspended on a stand, turning it is an easier task than using a pitchfork to turn a free-standing pile of compost. Some models are easier to turn than others, especially when full, you may need two hands but turning these tumblers are still easier than bringing out the pitchfork. Every time you add new scraps, you can easily give it a turn and speed up the decomposition process.
Things To Consider
If locating a tumbler on a patio, do take in consideration that it will leak water when wet. You could add a tray to catch any liquid. Purchasing a compost tumbler with dual chambers, helps you add to one section at a time and have ready-made compost quicker for your garden. As one chamber is finishing up the decomposing process, you can add fresh scraps to the second chamber.
Make sure to have a balanced mix of greens, browns, and water. The correct ratio depends on what biodegradable items you add. If it smells, you need to add more browns (leaves, straw, pine needles, etc.). On the contrary, if it’s too dry, then you need to add more greens (veggie and fruit peels, grass clippings, coffee grounds, etc.) or water to your compost. After some time composting and perhaps making smelly mistakes, it gets easier to keep a balanced ratio. I have definitely learned the hard way!
Vermicomposting
- Compost Time: 1-3 months depending on the amount of worms, the temperature, and the amount of vegetable waste added at one time
- Maintenance Rating: 2/5 Stars
- Materials Needed: In-Ground/Standing Worm Bin (diy or purchased); Live Red Wiggler Worms (at least 1 pound), Worm Bedding if not included in a purchased kit
If you are not grossed out about wiggly worms, vermicomposting is one of the quickest ways to compost your scraps. The worms don’t just do the composting for you but they also provide worm tea and castings as nutrients for your garden. Sounds like a triple win to me!
Worm castings are worm waste that is a great organic source of plant food for your garden. These organic nutrients can be costly to buy especially if you have a large garden to feed.
Worm tea is the liquid gold packed with nutrients that your plants need. Some wormeries are designed with spouts where you can easily add worm tea and dilute it with water into your watering can for your next watering session.
Things To Consider
Worms are cold sensitive! In order to keep them active and happy, they need to be located in an area that is dark, moist (not waterlogged) and preferably between 55-75 degrees Fahrenheit (13-24 degrees Celsius). You would need to put them inside your home or a garage that will not exceed 80 degrees Fahrenheit (27 degrees Celsius). Worms will die at 90 degrees Fahrenheit (32 degrees Celsius) and become inactive at low temperatures.
In addition, you have to know a little bit about their diet. What are worms allowed to eat? Certain scraps need to be avoided and some limited to them. For example, worms dislike extremely acidic conditions, so adding too much citrus fruit or peels is something to avoid. Meaning, you have some research to do before feeding your worm compost.
Bokashi Composting
- Compost Time: 1-3 Months
- Maintenance Rating: 2/5 Stars
- Materials Needed: Inoculated Grains, Two 5 Gallon Bucket With A Lid or Bokashi Composting Kit
Bokashi is an anaerobic Japanese compost method that can handle composting dairy products, meat, fish, oils, and bones, leftover cooked food, bread, etc. Bokashi composting does require you to layer a bran inoculated with the special mix of “Effective Microorganisms” with food scraps, let it ferment, and after a few weeks bury the contents directly in your garden or add it to your aerobic compost bin to finish decomposing.
Things To Consider
You can’t add large pieces of scraps. You would need to make time to cut them into smaller pieces.
Indoor Composting Methods
Electric Composter
- Compost Time: Under 24 Hours
- Maintenance Rating: 1/5 Stars
- Materials Needed: Electric Composter
With technology being so advanced now, we can literally compost within hours with an electric composter. These machines are made to break down many different food waste in as little as 24 hours by dehydrating and grinding down your kitchen scraps. Afterward, just add the results to your garden and let it finish.
Things To Consider: All methods to composting have their pros and cons. Using an electric composter is great for small scale composting! It’s quick and easy but can cost you a pretty penny!
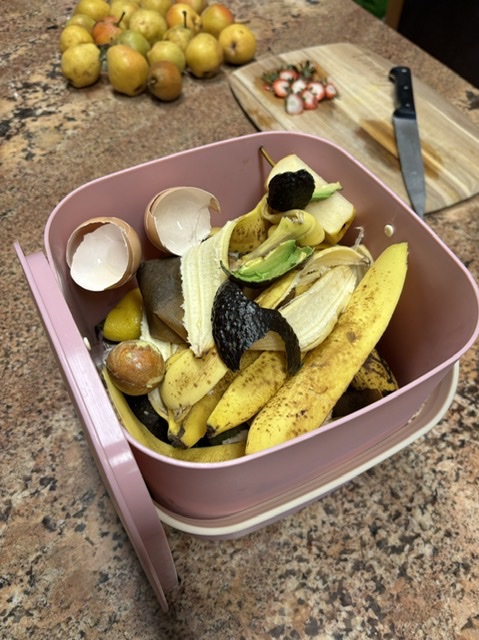
Countertop Kitchen Compost Bin
Since I started composting, my kitchen has always had a small countertop kitchen compost bin. It’s mainly used in relation with a second outdoor compost method. It’s always ready, and I have trained my children to know what food scraps are allowed in that bin. Every time our bin fills up, we empty it into our outdoor compost.
Things To Consider
When buying a countertop kitchen compost bin, buy a size that can easily be washed after you empty it in your outdoor compost. If the bin is too big and you don’t fill it quick enough to empty it often, its guaranteed that you will be inviting gnats to breed inside your home. I have made that mistake before! Lets just say, I have a small bin for a reason and I make sure to empty it at least every 2-3 days.
The dome top stainless steel compost bins with the carbon filters work great and are odorless but after frequent washing, it’s possible you will start to see a bit of rust appear. Bins with handles make emptying easier and having a flip top is a plus since you wont have to find a spot to place your lid while your adding your kitchen scraps.
Factors Affecting Your Compost
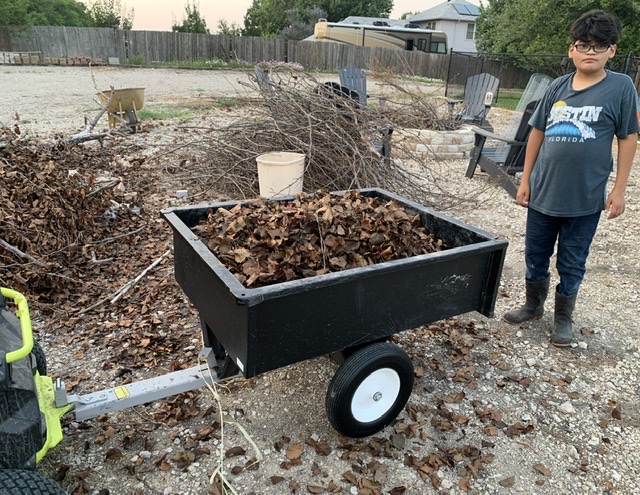
Compostable Materials
Materials used in your compost can affect how long it takes to decompose. For example, if you add large materials like large sticks, napkins, paper, and cardboard, it will take a lot longer to decompose than your kitchen scraps like fruit cores, vegetable peels, and coffee grounds. If you want your compost finished in less time, make sure to have a balanced ratio of browns to green materials and shred or chop anything you can into smaller pieces.
Environmental Influences
Cold Weather: Temperature drop will significantly slows down the composting process especially if your compost is open and exposed to snow, cold rain and wind.
Hot And Dry Weather: During very hot summers, like the ones in Texas, your compost can dry out if not covered or watered enough to keep microorganism activity going.
Wet Weather: During the rainy season, it’s important to keep you compost from becoming overly saturated. Excessive amount of water will convert your aerobic compost to anaerobic by preventing air to enter and killing off the microbial life.
Big Vs Small Piles
Unless you have a large farm or homestead that requires larger piles of materials to be composted, then bigger doesn’t necessarily mean better. A bigger pile of materials equals to a longer wait time. Some of us don’t have that much time or are not very patient. Whichever reason you relate to doesn’t matter. What matters is that in the composting world, a smaller pile of compostable materials will take less time to decompose and readily available for your garden.
Let Your Compost Breathe
How often you turn your compost to aerate it is an important factor affecting its readiness. When you turn your compost pile regularly, it adds oxygen, which in turn helps the microorganisms do their job and speed up the decomposition. It’s recommended to turn your compost every three to four days depending on the microbial activity present. Shoveling to turn your outdoor compost is not an easy task! Especially not in the hot summer months! Using a compost tumbler makes turning your compost so much easier.
Intended Use
If you are composting to use the final product as a mulch then it is safe to say that your compost will be ready sooner than if you were to mix it into your soil for planting. Mixing unfinished compost into your soil will rob your plants of nutrients. Its not a good idea! Trust me! Been there!
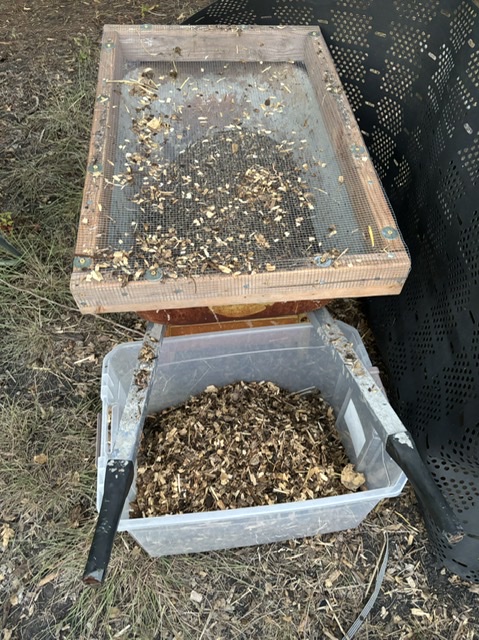
When Is My Compost Ready?
Compost is ready when it has a rich brown color, a crumbly texture, and an earthy smell. There should not be identifiable materials, nor an unpleasant smell. It, should also have decomposed into small, soil-like particles.
It’s not recommended to use compost too early but if its 90% close to being ready and you just really can’t wait to use it then I recommend you filter out the larger pieces with a DIY 1/2 inch hardware cloth sifter (large enough to fit your wheelbarrow) or just top dress your soil with it while it’s finishing up. Don’t mix unfinished compost into your soil because it will continue to use up nitrogen to finish decomposing.
How Long Will Your Compost Last?
Compost does not go bad, but it will lose nutrients over time. It is at it’s best, 3-4 months after it is completed. It can be used or saved for as long as you like, but it will also continue to decompose and shrink in size. Every year gardeners have to add compost to their garden beds because at the end of every season, the dirt just disappears. Coincidence? I think not! It’s because of decomposition! The soil level will shrink and you will continue to add compost for the benefits of your soil and plants.
Conclusion
So, will you have the strength and patience needed to tumble or turn a compost bin, will you be ok with worms in your home or garage during the colder months or will your wallet say yes to that convenient modern electric composter? Whatever compost method you decide to use really depends on you. In the end of it all, you will have precious compost for your garden, and peace of mind that you did a great deed to our planet and everything and everyone living on it. Keep on Composting!
Resources & Recommended Reading
Personal Experience and Research
Books
Title: ORGANIC BOOK OF COMPOST (2nd Revised Edition); Easy and Natural Techniques to Feed Your Garden
Author: Pauline Pears
Title: Composting For The Absolute Beginner; How To Improve Your Soil For Better Organic Gardening
Author: Dede Cummings
Title: The Compost Specialist; The essential guide to creating and using garden compost, and using potting and seed composts
Author: David Squire
Title: Epic Homesteading; Your Guide to Self-Sufficiency on a Modern, High-Tech, Backyard Homestead
Author: Kevin Espiritu Of EPIC GARDENING
Title: Let It Rot!; The Gardener’s Guide to Composting (3rd Edition)
Author: Stu Cambell
